Ebook: Tiny House Blueprint: Inspiring Floorplans for Small Living
Limited-Time Offer: Now Only $14,99 (Originally $19.99 - Save 25% )
Day(s)
:
Hour(s)
:
Minute(s)
:
Second(s)
Get our eBook, “Tiny House Blueprint: Inspiring Floorplans for Small Living”, for just $14,99! Perfect for anyone starting out or refining their tiny living plans. Transform your dream into reality today!
Join our mailing list to receive the latest news and updates from our team.
You have Successfully Subscribed!
Tiny homes are energy-efficient, right?
That’s one of the statements/questions I hear the most from the tiny curious, but the answer isn’t always a resounding “yes.”
But it can be… (especially if you implement the tips I give in this article)
Just about every tiny home is going to be inexpensive to operate from an energy standpoint, but that doesn’t mean they’re efficient.
Effectively planning out the insulation for your tiny home can save you even more money and reduce your emissions to boot.
Below you’ll find a guide to tiny house insulation and an overview of the best tiny house insulation options with some advice on the best choices to make.
How to Insulate a Tiny Home
The trick with tiny house insulation is finding the right mix between R-value and thickness. You want something that’s going to keep your internal climate stable without taking up too much precious space.
Heat naturally rises. You should plan your insulation around this principle.
As a result, the thickest insulation should be on your ceiling, with the walls next thickest and the floor thinnest.
Make sure you include your insulation in the planning stage of your build.
You want to know how much space you have to work with in the walls, floor, and ceiling, as well as what kind of conditions you’re likely to face.
If you’re building a tiny house on wheels (THOWs) you’ll have substantially different needs than a foundation built tiny home.
How to Insulate a Tiny House Roof
The roof of your tiny home will offer the most flexibility as far as insulation thickness and type go. You can add on an extra inch or two without sacrificing a ton of living space.
The vertical positioning of a roof also allows you to use less expensive and more form filling insulation types. The nature of heat transfer makes roof insulation the most important of all.
Your thickest and strongest insulation will go here to prevent heat from rising and escaping your home.
The floor of your tiny home, especially in THOWs (short for “Tiny House On Wheels”), also needs to be insulated. This is primarily to prevent the surface under your home from allowing heat to seep up through your floors.
If you’re building a THOW, you’ll fit the insulation into the frame of the trailer. It’s unlikely you’ll have more than a few inches of insulation, so make sure it’s highly insulative.
Measuring Insulation
The efficiency of insulation has been standardized using the R-value metric. R-value measures thermal resistance. A higher R-value provides greater thermal resistance and therefore better insulation.
For tiny homes, you want to choose the highest R-value insulation you can. This gives you greater thermal protection without eating up too much space.
One thing to keep in mind is that the R-value of many insulations can change over time. Age, temperature changes, and, especially accumulated moisture, can significantly lower the R-value of insulation.
Choosing Insulation for Your Climate
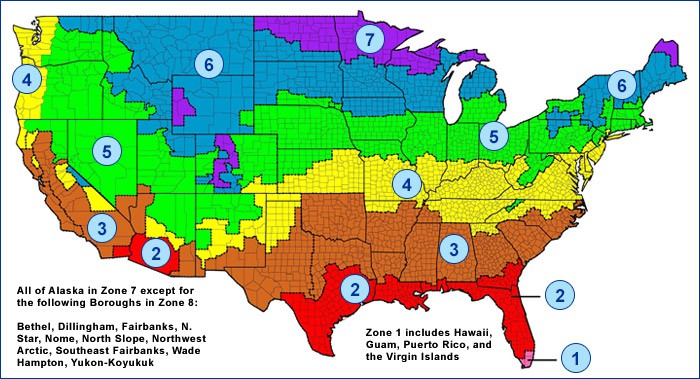
Depending on where you’re located you’ll require a different level of insulation. Energy Star has broken the U.S. down into eight different climate zones and offered different recommendations for R-value.
Keeping these zones in mind it’s recommended you have roughly the following R-value insulation:
Climate Zone
Roof R-Value
Floor R-Value
1
R30 to R49
R13
2
R30 to R60
R13 to R19
3
R30 to R60
R19 to R25
4
R38 to R60
R25 to R30
5-8
R49 to R60
R25 to R30
These figures reflect the insulation needed in your ceiling/roof and floor. The walls should include the standard amount of insulation that can fit your framing material.
Tiny House Insulation Options
Below, I go through each of the insulation options on the market today, and what the best uses are.
As a summary of what I go in depth before, here are my recommendations:
Type Of Insulation
Stationary or THOW
Area Of Home
XPS
THOW
Roof
Closed-Cell Spray Foam
Stationary
Roof
Rigid Foam Board
Both
Floor
Closed-Cell Spray Foam
Stationary
Walls
Rigid Foam Board
THOW
Walls
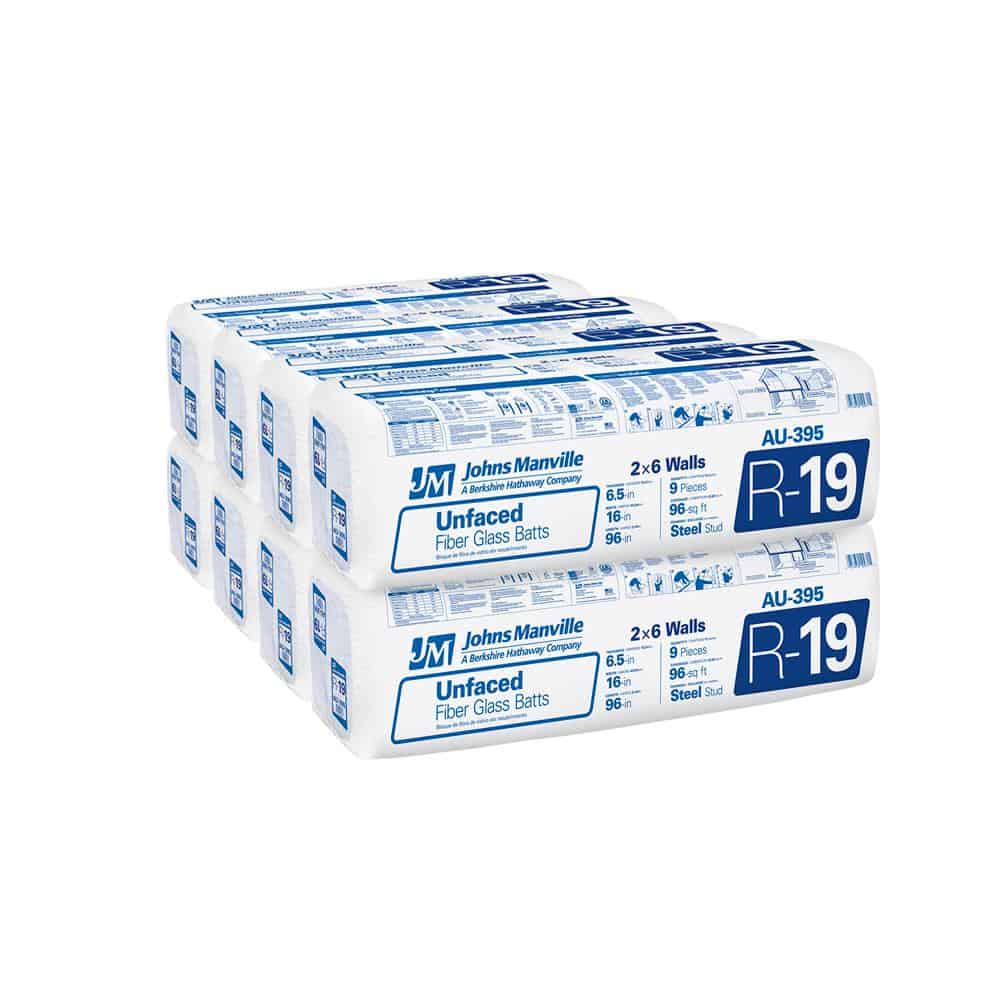
Option #1: Loose-Fill and Insulation Batts
Loose-fill and insulation batts are two of the cheapest and most common insulation options available. They can be made out of everything from fiberglass, denim, cotton, and even wool.
Think about the bright pink cotton candy-like insulation that you find in an attic or crawl space.
Depending on the material they offer an R-value between 2 and 3.8 per inch. Batts are more efficient than loose-fill and much easier to install.
For ceilings or walls, you can pretty much lay them in place and close up space.
Unfortunately, they aren’t great for use in THOWs.
The motion of your tiny home can cause the insulation to shift and even sag. This is especially evident in loose-fill fiberglass and cloth insulation.
Where I would recommend batts is in your roof.
The vertical arrangement allows them to stay in place better and maximizes the benefit of their thickness.
The only downside of this method is that you’ll need to either tack/tape them in place against your ceiling boards or install them onto the frame and ceiling before you install your roof.
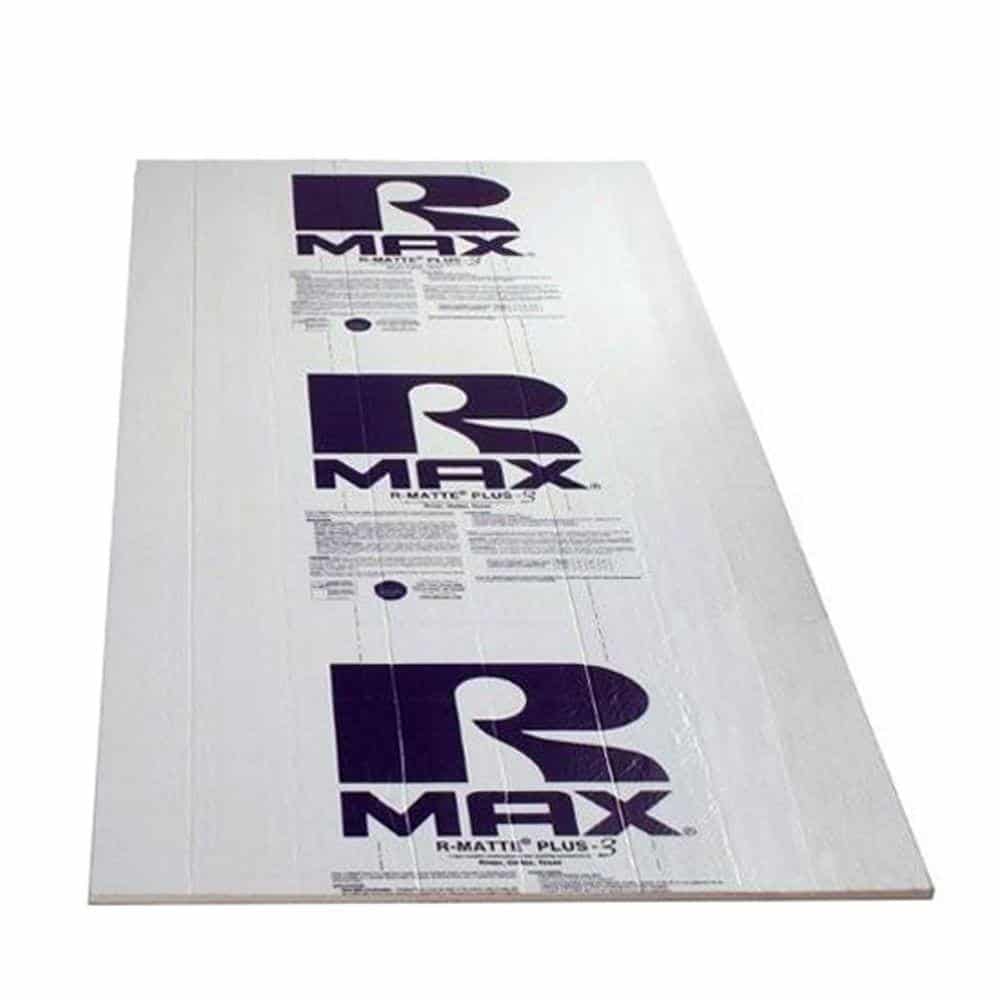
Option #2: Rigid Foam Insulation Board
Rigid foam insulation is sold in large sheets that range between ½ inch and 2 inches in thickness. They’re similar in R-value and efficiency to spray foam, but much easier to work with.
Anyone with a little bit of practice can cut, shape, and install foam board without difficulty.
Foam insulation boards are the best option to insulate your THOW’s floor.
There are three types of rigid foam insulation inboard that are most commonly used.
1. Expanded Polystyrene (EPS)
EPS is the cheapest and lightest form of rigid foam insulation.
It’s easy to work with and offers comparable R-value to the highest level of insulation batts, about 3.5 to 4 R-value.
It’s called expanded because of the large bubbles of trapped air it contains.
These are the actual insulative material.
Other than how easy it is to work with, the stability of EPS is its biggest benefit. EPS doesn’t lose R-value over time unless it’s physically damaged.
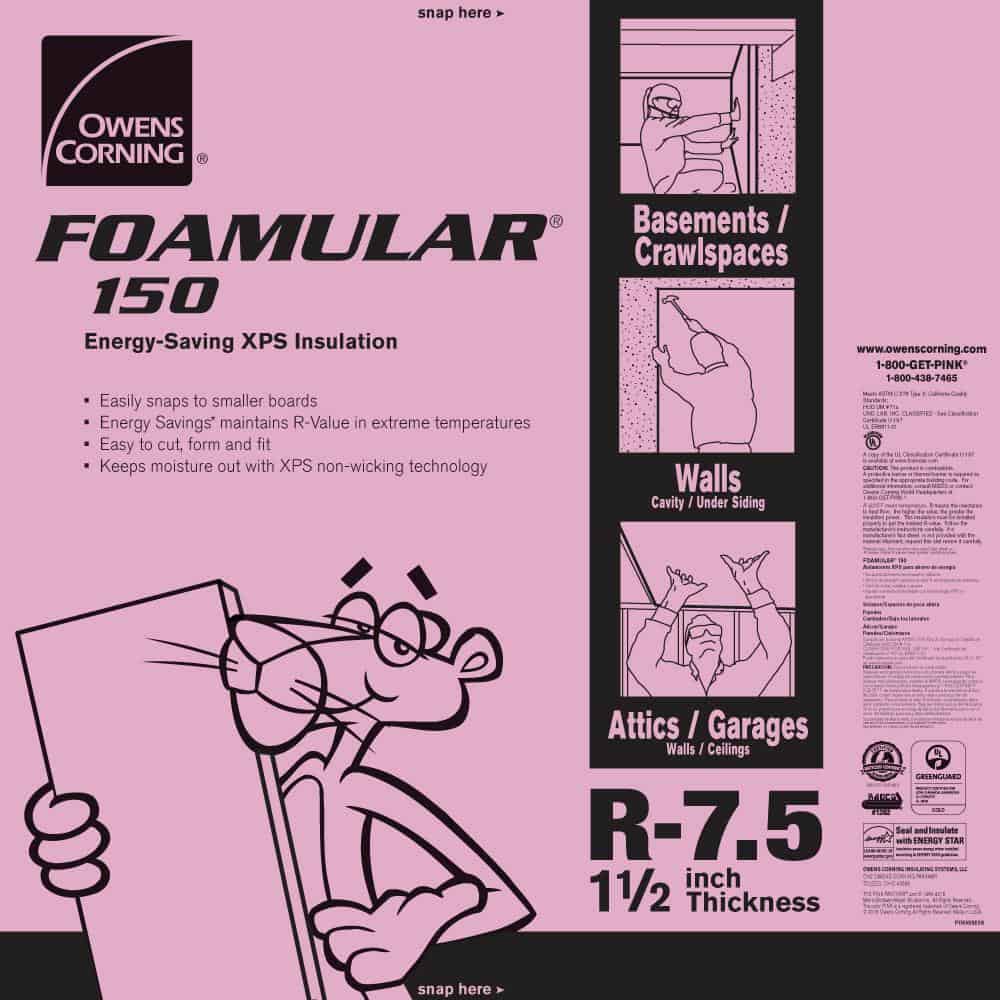
2. Extruded Polystyrene (XPS)
XPS is made from the same materials as EPS but is extruded in smooth sheets rather than molded beads. It’s a bit more expensive than EPS, but more efficient and equally easy to work with.
XPS has an R-value of right around 5.
XPS is easy to find in just about any major hardware store and can be identified by its common bright pink color.
Amusingly enough, one of the major manufacturers has chosen to market their XPS with a Pink Panther theme.
The only downside of XPS insulation is its longevity. It loses about 20% of its R-value over several years.
3. Polyisocyanurate (Polyiso)
Polyiso is the most expensive and most efficient rigid foam insulation available. It provides an R-value of between 6 and 6.5.
It’s faced on both sides with protective, and usually reflective, material.
It helps maintain its shape and gives it extra durability when used in facing situations. On the surface, it would seem like one of the best tiny house insulation options, but it has a dark side.
Polyisocyanurate loses its insulative properties as temperature drops. As wild as it sounds, polyiso begins to insulate less right when you need it most.
If you’re taking your tiny house into a climate zone likely to be below 50 degrees Fahrenheit, I highly recommend you choose a different option.
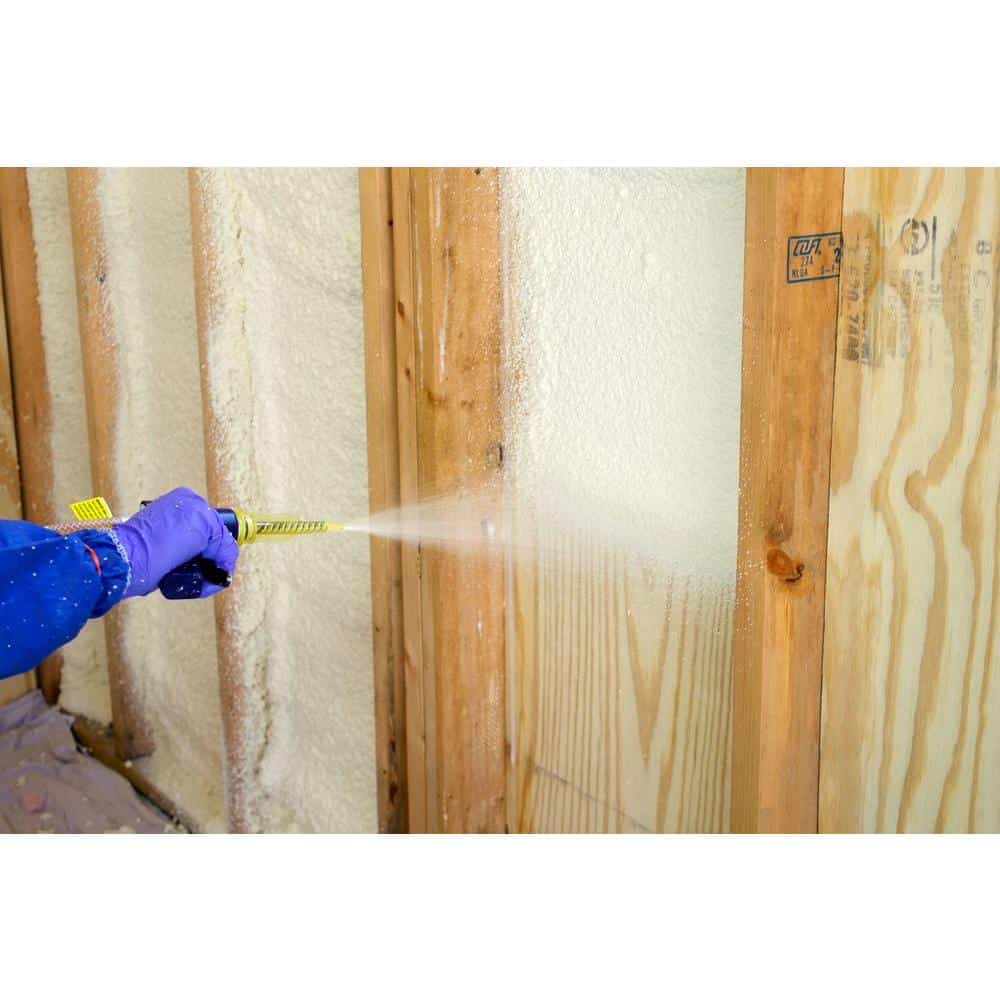
Option #3: Spray Foam
Spray foam has been the darling of the upscale building world for about a decade now, and for good reason. Spray foam acts as both an insulator and an air sealant.
It’s sprayed in much like an adhesive and seals against the walls and boards of your home.
There are a couple key points to remember with spray foam.
Most importantly, it isn’t something you should really do yourself.
There are a ton of kits and DIY solutions out there, but if you make even a small mistake, it can be difficult and expensive to fix.
It’s not something that you can just plug and play.
To do it properly on a reasonable scale, you need to mix multiple chemicals in precise proportions. Even a small error can result in smelly off-gassing, an improper cure, or greatly reduced R-value.
Spray foam expands massively as it’s applied.
It also acts as a pretty strong bonding agent between the framing of your tiny home and the exterior vapor barrier.
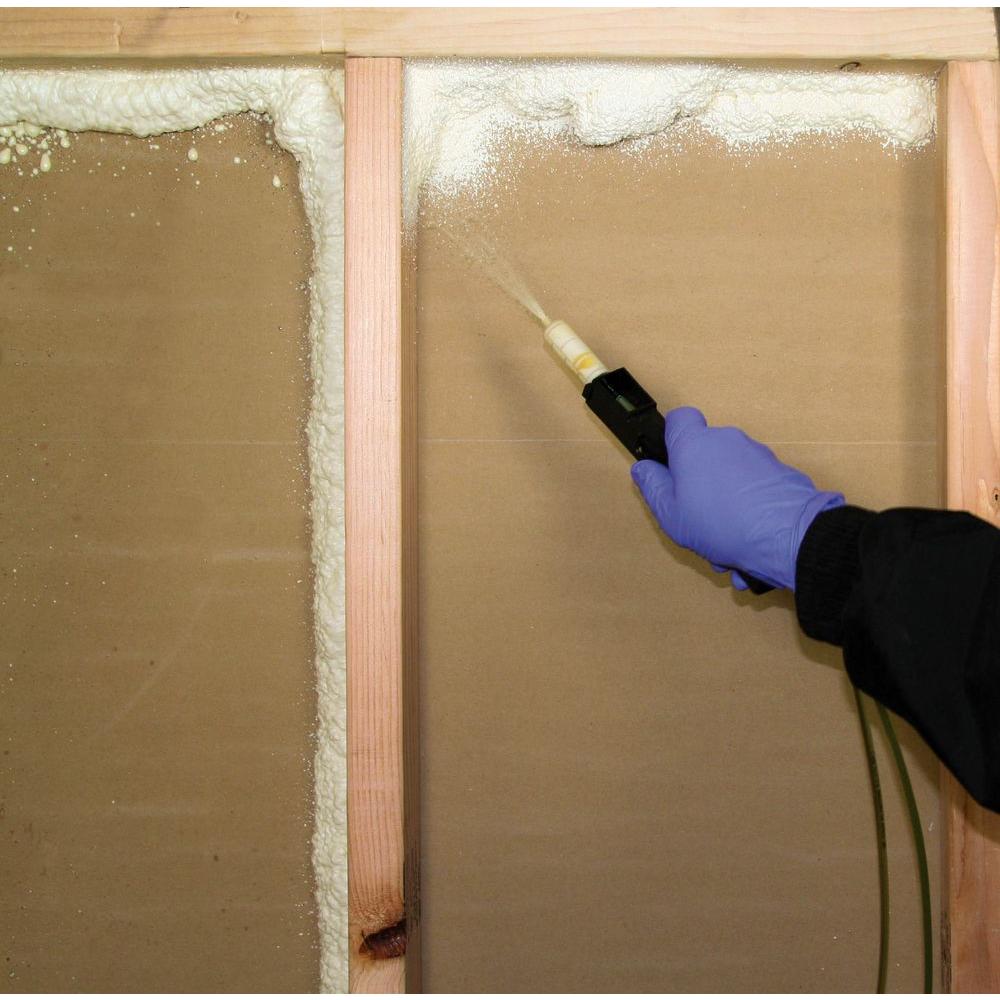
Option #4: Open-Cell Spray Foam
Open-cell spray foam is a lighter, softer, and generally easier-to-work-with insulating product. It’s easier to install than closed-cell spray foam and costs less as well.
It has an R-value of 3.7 to 4.
When applied properly, open-cell foam expands rapidly and massively.
I’m talking up to 100 times its sprayed size. This is great from the perspective of sealing your home against the outside as it expands to fill every little nook and cranny of the space it’s applied to.
The downside to this is that it’s really easy to overfill, and requires specialized training to get the right amount in the right location.
Open-cell spray foam is still a valid option, especially for a THOW. Because it’s softer and more pliable, it’s less likely to experience vibrational damage.
If you absolutely want to DIY your spray foam installation, I recommend you choose open-cell.
It’s much more forgiving to work with and uses less volatile chemicals as propellants.
Option #5: Closed-Cell Spray Foam
Closed-cell spray foam is one of the densest and most efficient insulation options available to tiny dwellers.
It offers an R-value of 6 to 6.5 and provides an air and moisture tight seal between the framing of your house and the exterior vapor barrier.
It’s not a totally rosy picture sadly.
To start with, closed-cell spray foam is a precision product that requires very particular installation.
You need to hire a professional to safely and effectively install it in your tiny home.
Because it’s so dense and rigid, it’s also been known to suffer from the movement that can come from THOWs or RVs.
Small cracks can form across the surface that allows air, and more importantly heat, to flow through.
For a foundation built tiny home or mostly stationary THOW, it can be a really good option.
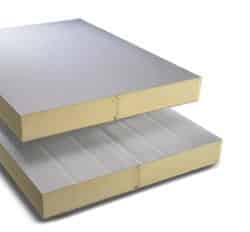
Option #6: Structural Insulated Panels (SIP)
The last insulation I’ll talk about is one that doesn’t get nearly the attention it deserves in the tiny community.
Structural insulated panels, more commonly knowns as SIPs, or hilariously as SIP panels, are a relatively new development in the building world.
Instead of building a wall then insulating it, SIPs incorporate the insulation material into the structural design of the wall.
If you look at one from the side, you’ll see a thick layer of foam insulation sandwiched between two pieces of oriented strand board (OSB), sheet metal, or plastic.
The R-value of a SIP varies depending on the insulative agent used. Both XPS and EPS are common.
The obvious benefit of SIPs to the DIYer is the added ease of construction.
You can order precut and sized panels that you just have to assemble in place.
Instead of building a wood frame, attaching a wall, and adding insulation, you’ve done it all at once and in a fraction of the time.
If you’re planning to DIY your tiny home, I highly recommend you consider SIPs from the get-go.
Choose the Insulation That Makes Sense for Your Needs
Where you’re going, how you’re getting there, and where you’re stopping in between are some of the best questions to ask yourself when thinking about tiny house insulation.
Figure out what climate zone you need to insulate for, how frequently you’ll be traveling in your tiny home, and what kind of design you want to go with.
As for the different parts of your tiny home, there are a few recommendations I can make.
For the roof, you should go with the most efficient option possible, either XPS or closed-cell spray foam if you aren’t traveling too much.
You can also use batts of fiberglass or natural materials to save money as well.
The floor should definitely be a rigid foam board. It’s the easiest and most efficient to install and provides a good base to build the rest of your home on.
Finally, we get to the walls.
SIPs are a great option but don’t work for every person. If you’re not traveling too much, I say go with closed-cell spray foam. If you are, a rigid foam board fits snuggly into the gaps.
Josh is a freelance writer and avid outdoorsman. He graduated from the University of Georgia with a B.A. in Political Science and has done his best since to live location-independent. He's been a firm supporter of the tiny movement, new homesteaders, and sustainable alternative living and used his knowledge of these topics to convert a 1999 Dodge Ram van to explore as much of Wild America as he could reach.
Join the 2,995 tiny house lovers
Join our mailing list to receive the latest news and updates from our team.
Given the pace of life today, one of the most sought after solutions is the tiny home. There are people who have embraced the minimalist lifestyle, but do not fully know how to pivot to that kind of norm or do not have the resources and knowledge to achieve it. A tiny...
Minimalism has gained traction in recent years as an admirable avocation or trendy design style. This is particularly useful for people who have the aspiration to live in tiny houses. Adopting a “less is more” attitude brings more order in small space while also...
So. Is it really worth it to put your money into solar panels for campervans? Are solar panels even needed to live off grid? Let’s help you decide whether or not solar panels are suitable for your travel lifestyle and budget. Understanding Solar Panels Before...
We use cookies to optimize our website and our service.
Functional
Always active
The technical storage or access is strictly necessary for the legitimate purpose of enabling the use of a specific service explicitly requested by the subscriber or user, or for the sole purpose of carrying out the transmission of a communication over an electronic communications network.
Voorkeuren
The technical storage or access is necessary for the legitimate purpose of storing preferences that are not requested by the subscriber or user.
Statistics
The technical storage or access that is used exclusively for statistical purposes.The technical storage or access that is used exclusively for anonymous statistical purposes. Without a subpoena, voluntary compliance on the part of your Internet Service Provider, or additional records from a third party, information stored or retrieved for this purpose alone cannot usually be used to identify you.
Marketing
The technical storage or access is required to create user profiles to send advertising, or to track the user on a website or across several websites for similar marketing purposes.