There are many joys that come from cutting yourself loose from the grid, but continuously sweating profusely in 90+ degree heat is not one of them.
Tiny dwellers, homesteaders, RV’ers and others living off the grid (myself included), have long been denied the cool, cold and comforting breeze of an air conditioner.
For too long we’ve been told that air conditioning and solar power are mutually exclusive.
Today, I’m excited to tell you that this is no longer true, that solar and AC efficiencies have reached a tipping point that make it not just possible, but downright enticing.
Follow along below to learn more about air conditioning with off-grid solar, and to find a step-by-step DIY guide for the basic installation of one of the most popular off-grid solar AC units: The highly rated Mr Cool Ductless Mini Split.

**For those of you who want to know what AC units I recommend without reading the whole article, I listed them below (although I highly recommend reading through this article carefully before making any purchase):
Assembling and Installing an Off-Grid Air Conditioning System
Basic Requirements: Solar Panels, Batteries, and Inverter/Breaker
Before I go any further I wanted to lay out the basic solar setup you need for any permanently installed air conditioner.
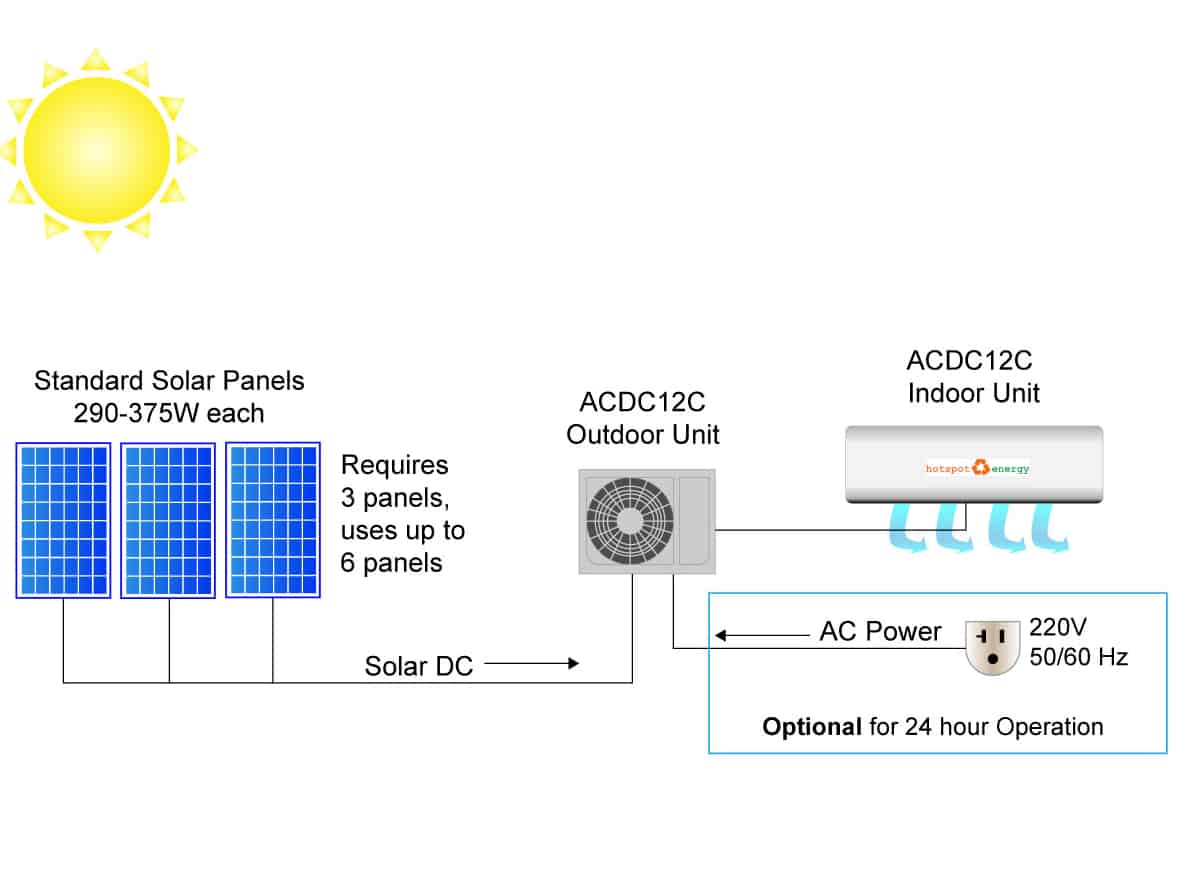
At a bare minimum you’ll need panels, batteries, and an inverter with about two to four times the required wattage of your AC unit.
If you don’t already have a solar system picked out, check out our article that dives into how to install solar panels for your home.
Air conditioners are power hogs when they start up. The initial draw to get the compressor up to the proper pressure can take a lot of power, well over their operating wattage.
You also need to have an inverter that’s fully wired into a breaker box with either fuses or circuit breakers. It allows you to hardwire your AC unit into the power system.
Some window AC units don’t require this and are designed to plug right into a standard outlet. Make sure you keep the power demand of your desired AC unit in mind while sizing and wiring your solar system.
Installing Your AC Unit
My recommended choice is a ductless A/C unit and below, I will be providing step-by-step instructions for setting this up.
While you can set up the ductless mini split unit of your choosing, the instructions below will be based on installing an amazing unit that I highly recommend called MRCOOL (I provide the link to the unit later in the post after I go through how to set it up).
It’s the only air conditioner designed for DIY’ers, so you don’t need an HVAC specialist.
I’ll explain in more detail below, but the MRCOOL unit takes out some major steps that would require a professional in most cases, so that you can set this up on your own.
Below, we outline step by step how to set it up. And don’t worry if you’re a visual learner–we provide a couple videos later in the article that shows exactly how to set up your MRCOOL unit.
Step 1: Gather Your Tools/Materials and Double Check Your Measurements
The first step in installing your AC unit is to make sure you’ve got all the proper tools for the job.
For a basic ductless mini-split installation, you’ll need a power drill with core drill, wrench set, a torque wrench, multimeter/voltage tester and Phillips and flathead screwdrivers.
You’ll also need a level, stud finder or knowledge of stud locations, measuring tape, and a washable marking tool like a carpenter’s pencil to make measuring and marking installation locations easier.
Fortunately, the MRCOOL system actually comes with all the mounting hardware needed to install it and hook it up.
It even comes with sealant and insulation pieces for the connecting hardware and pipes.
Once you’ve verified that all the needed tools are ready to go, it’s time to pick out the location of your indoor and outdoor units. They need to be relatively close together and have as little distance between them as possible.
For the indoor unit, look for places with good air circulation that have the strength to support the unit.
For a tiny home, the best place to put your AC unit is probably going to be at ‘lower’ ceiling level so that it can provide cooling to both the loft space above and downstairs space below.
It also cuts down on travel distance between the two units. For the outdoor unit it really depends if you’re in a tiny house on wheels or a traditional off-grid home.
In either case a mounting bracket is an option. It attaches to the outside of your home and keeps the outer AC unit off the ground. It’s a necessity for a tiny house on wheels, for obvious reasons.
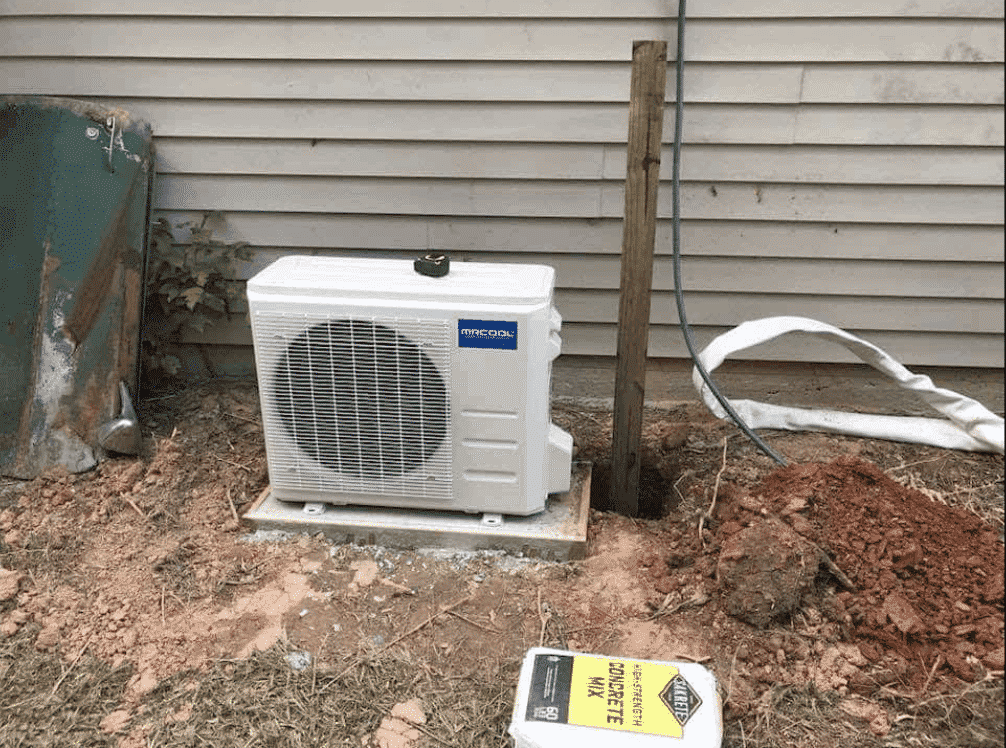
You can also go with a concrete pad or even lay out some paving tiles to place your AC unit if you like.
Step 2: Install the Indoor Unit
The first step in putting up the indoor unit is marking off where you want to place the mounting bracket. Use your level to make sure it’s nice and flat, then mark where on your wall you want to place it.
Once that’s done, use your power drill to screw the bracket into studs and firmly attach it to the wall.
Then you should use your core drill attachment to drill a hole giving access to your stud bays or directly through your wall if in a cabin or something similar.
Make sure you drill the hole with a slight angle going inwards.
Use the included sleeve to seal off the hole to protect your home from wind or water ingress.
At this point, you can finish unwrapping the indoor unit and attach it to the mounting bracket. Then attach and route the drainage and refrigerant piping through the hole.
Make sure it has a slightly downward angle going from indoors to outdoors. It ensures that the condensate will drain in the proper direction.
I found this video by DIY Youtuber April Wilkerson to be incredibly helpful. She gives you an amazing visual of the entire installation process:
Step 3: Install the Outdoor Unit
Installing the outdoor unit is actually even easier than the indoor unit. Attach it to either the concrete pad or a mounting bracket attached to the side of your home.
Once that’s done, all that’s left for the basic installation is to connect the drainage and refrigeration piping that’s already hooked up to the indoor unit and routed through the access point.
You can also go ahead and seal the hole with insulation foam or another water tight sealant.

Step 4: Charge the Refrigeration Piping
If you followed my advice and went with the MRCOOL mini-split, you’re now at the point where you can pressurize the whole system using the Quick Connect Lineset.
The system works using a system of valves and pressure gates that let you first attach the piping to the units, then release the refrigerant that’s contained inside.
This is where the torque wrench really comes in handy, as you need to get precisely the right pressure point to release the refrigerant without damaging the system.
You can use other wrenches in a pinch, but I recommend you go with a torque wrench to protect your investment.
If you chose a different mini-split, I highly recommend you contact a professional HVAC technician at this point.
Pressurizing an AC system is complicated and requires very specialized tools. It’s probably going to cost less to get an expert out than to actually get what you’d need to do it on your own.
Once the system is pressurized you’re ready to wire it up and get that sweet, sweet AC blowing.
Step 5: Wire the Indoor and Outdoor Units Together and Connect to Breaker Box (Or Call Up an Electrician)
This is the part most people find the most nerve wracking. Wiring an AC unit is serious business, and not something to be undertaken lightly.
If you’re at all concerned about your ability to do it right, I highly recommend you get a licensed electrician out to finish the installation.
If you’re confident in your skills, make sure that all power is turned off at the breaker, then go ahead and connect the inner unit and outer unit with the control wire.
This also serves as the power system for the inner unit, so be careful with the connections.
The last step is to wire the outer unit into your breaker box.
This isn’t as complicated as it may seem as the wires are color coded and there are only three you need to connect.
The red and black wires are hot wires that connect to the breaker, while the final wire is a ground.
This step is going to vary widely depending on what kind of solar system you went with, what type of inverter you’re using, and what kind of breaker or fuse box you choose.
Double check with the manufacturer of your breaker box to find out the exact procedure for wiring in a new circuit.
Just to make sure you heard me before, if you have any hesitation about this step at all, I highly recommend you hire a licensed electrician.
It won’t cost much, and it can save you a significant headache or even a serious injury.
Step 6: Double Check Everything, Then Enjoy the Cold Air
Before you flip your main power back on, you should double check all the connections and ensure that every pipe, wire, and component is where it should be. It’s a small thing, but taking the extra half an hour or so can save you a significant headache if something little is out of place.
Once that’s done, you’re ready to activate your ductless mini-split and start enjoying cold, dry air no matter where you find yourself.
Our Recommendation For a Ductless Mini-Split AC Unit: The MRCOOL DIY Line
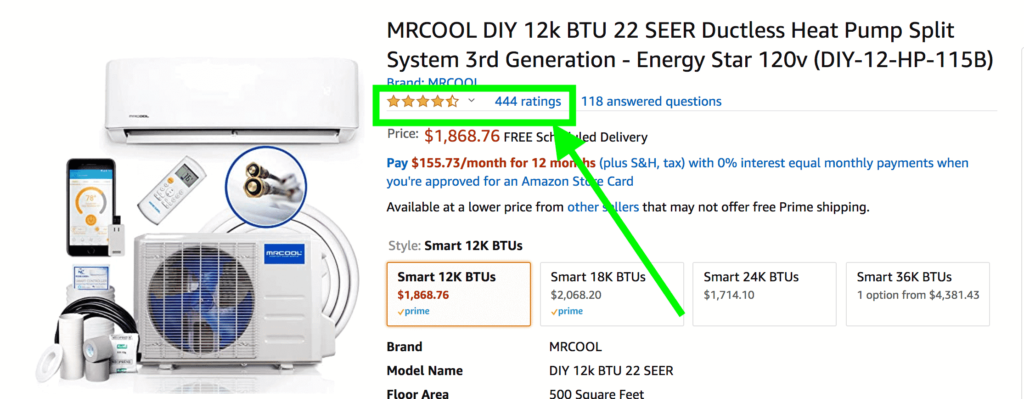
There are a lot of great ductless AC units out there, but few provide the specific value to the tiny house and off-grid community that MRCOOL does. They have a line of ductless mini-split models that were designed to allow much easier DIY installation.
They offer their DIY line in 12,000 BTU, 18,000 BTU, 24,000 BTU, and 34,500 BTU. This allows you to pick the perfect unit based on the size of the area you want to cool.
Only the 12,000 BTU model comes in a 115V version, but if you’re willing to invest in a larger inverter system, you can still operate the more powerful units at 230-240V.
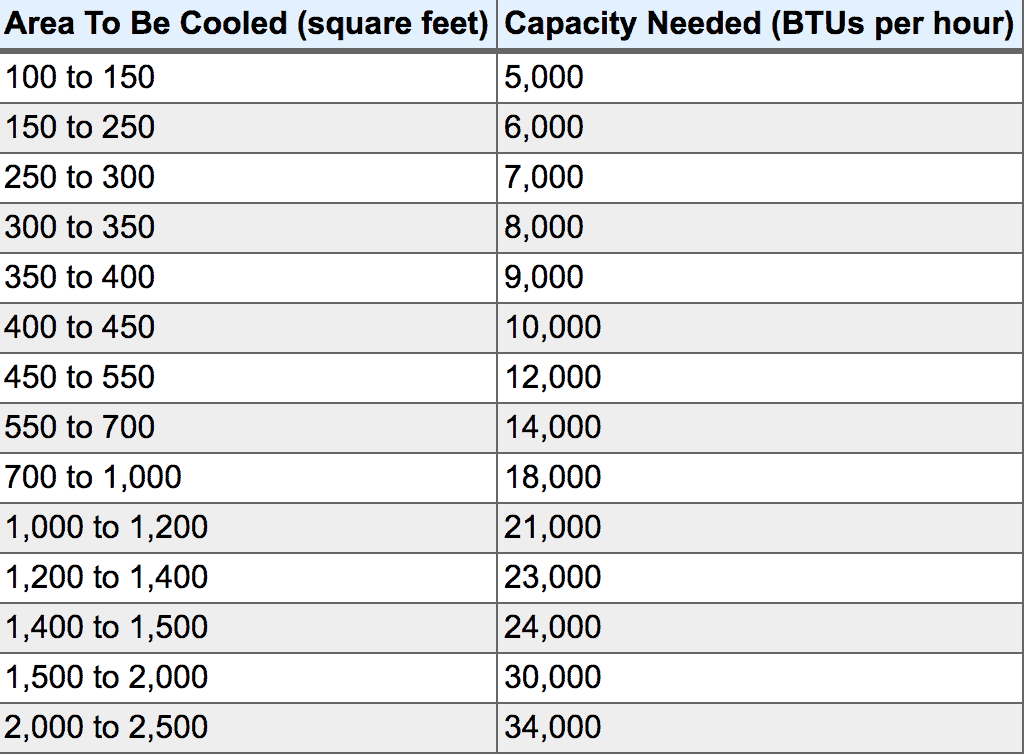
If your home is a standard tiny home, go with the 12,000 BTU model. This chart below will help you determine how many BTUs you will need.

By far the most complicated and difficult step of DIYing an AC unit is pressuring the system with refrigerant.
It requires specialized tools and knowledge that you can’t really get from anything other than installing AC units.
MRCOOL takes that totally out of the equation with their award-winning precharged 410 Quick Connect lineset.
It’s charged with refrigerant to just the right level needed for the unit purchased and requires no tools other than a wrench to hook it to your AC compressor and open up the valve to release the refrigerant.
It’s that easy.
Even better, the AC unit itself is very well made and offers excellent features including WiFi connectivity, a wireless remote control, detailed installation instructions specific to each model, and even a smartphone app to monitor the temp and humidity of your home in real-time.
Videos we recommend watching
While everything above is what you need to install your MRCOOL unit, if you’re anything like me, having a visual is very helpful.
The 2 videos below (1 from a DIYer and 1 from MRCOOL themselves) will be super helpful, in addition to the video I posted above by April Wilkerson.
I scoured Youtube to make sure I found the most helpful videos, so I highly recommend watching them before you get started.
Our Recommendations For a Window AC Unit:
If you prefer simplicity and don’t mind the aesthetic of a window AC unit, I highly recommend the following units based on square footage of your home:
I did some research to make it simple for you to choose a unit based on the square footage of your home:
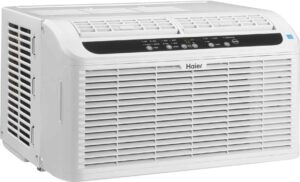
- 250 Sq. Feet Or Less: Haier 22″ 6,000 BTU model
- 251-500 Sq. Foot – Friedrich CP10G10B 10,000 BTU model
- 501-750 Sq. Foot: TCL 15W3E1-A 15,000 BTU
- 750-1,200 Sq. Foot – LG LW1817IVSM 18,000 BTU model
- 1,250-1,500 sq foot home – GE AEE24 DT 24,000 BTU model
Window AC units get a bad wrap for their less than stellar aesthetics and the loss of window space they entail, but they are very much a valid option.
They’re by far the easiest to install, use the least energy for the most cooling potential of any single-room AC system, and cost a fraction of what other options do.
I wanted to make sure to give you a good option for window AC units for those interested, and the ones listed above do definitely that.

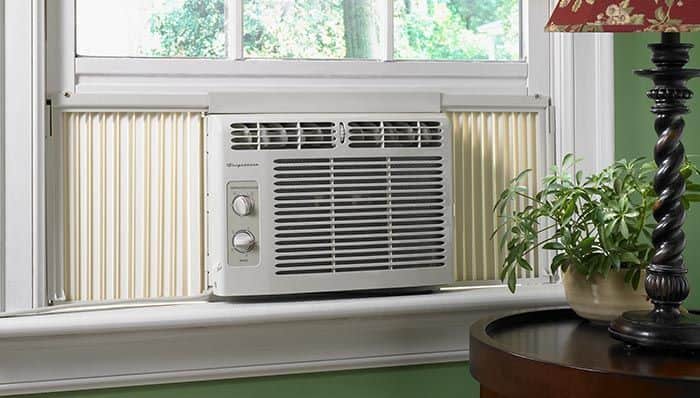
As far as installation goes it couldn’t be more simple. All you have to do is fit the mounting seal and AC unit into your window, tighten it in place, and plug it in.
That’s it, no wiring, no charging refrigerants, no hassle.
You do lose part of your view, but if you build it into the overall design of your home it’s easy to part with.
Even better, they use as little as 550 watts/hour (for the smallest unit). That’s very sustainable for most off-grid solar systems of reasonable size.
Depending on your living situation, you can even take it out of the window during cooler months to get your view back.
All in all, it’s not a bad option, especially considering it costs less than a third of the price of your average mini split system.
What to Look For in An Off-Grid Air Conditioning System

Energy-Efficiency and Voltage
By far the most important point when considering a tiny house or off-grid air conditioner is how efficient it is. If you’re running off a solar power system, every watt counts, so you need to make sure you’re getting the most cooling/heating power for the power draw.
Actually figuring that out can be difficult, but thankfully there are resources out there that can help.
Required Voltage – With AC unit voltage, there are really just two numbers you need to worry about: 115-120V and 200-240V. These are the two most common operating voltages of modern appliances, and every AC unit you’re considering will run on one of them.
AC units that run at 115V require a less powerful (and less expensive) inverter and use fewer watts than do those running at 200-240V.
The tradeoff is that they aren’t as powerful and can’t cool as rapidly. Any AC unit above about 12,000 BTUs is going to require a 200-240V connection.
Required Wattage – Wattage is the real bread and butter of AC power usage. If you’ve already built your solar power system, you no doubt remember picking out panels based on watt ratings and matching them with inverters that produce a specific number of watts.
The wattage an AC unit lists is the best measure of how much power it will use in an hour.
To find watts if the manufacturer doesn’t list them, look for the voltage and amp draw. Multiply volts by amps and the resulting number is the wattage of that air conditioner.
As an example, a 115V AC unit drawing 15 amps per hour would have an hourly demand of 1,725 watts (115 x 15 = 1,725).
Effective Cooling Area
It honestly doesn’t matter how efficient an AC unit is if it’s inadequate to cool the space you need it to.
Thankfully with tiny homes, this usually isn’t an issue, as even the smallest and least powerful AC units are capable of cooling a 250-300 square foot space.
If you’re in a larger off-grid home or you want to cool multiple rooms, you need to pay more attention to the British Thermal Units, commonly called BTUs. This is the standard unit used to measure thermal energy and is listed on basically all air conditioners on the market today.
6,000 BTUs is about as small as you’ll see an AC unit, but from there they climb to truly massive levels.
For off-grid use I don’t recommend an AC unit of more than about 15,000 to 18,000 BTUs.
That’s powerful enough to effectively heat/cool a 1,000 square foot space, but will draw a substantial amount of power.
Most 15,000 BTU AC units will draw at least 3,000 to 4,000 watts per hour. You’ll need a very substantial solar system to operate that.
If your home is under 550 sq. feet, I recommend going with a 12,000 BTU unit. This will give you more than enough power and still give you the A/C necessary to be comfortable.
Aesthetics
It’s not really a functional issue, but there’s no denying that the appearance and style of different AC units can play a big role in how they’re used.
By just about any measure, window AC units are the most efficient for tiny home use, but they’re also widely disliked because of where and how they’re mounted.

You lose an entire window to them, they stick out at least a foot from the side of your house, and they have an overall ‘look’ that many, many tiny dwellers wish to avoid.
If you’re okay with the aesthetic implications of a window AC unit though, they do offer the easiest installation, excellent efficiency, and the most easily targetable cooling. One I highly recommend is this one from Haier.
I also go into more detail at the bottom of the post for those who would prefer to go the window A/C route.
The rest of this article will be about installing my favorite type of off-grid A/C unit: the ductless mini split.
Ease of Installation
Installing an air conditioner is one of the more advanced DIY projects you can pursue. For a ductless mini-split you’ll need to wire them, pressurize the refrigerant, connect them to a drainage pipe, put them into place on your home, and double check all the connections.
For most situations, it’s going to be a multi-day job, and require a range of tools, pipes, tubing, and other materials. The upside to this is that mini-splits are one of the most efficient AC systems available and they’re far, far less visible and in the way than a window unit.
Final Thoughts
As you can see above, it’s no longer a pipe dream to think about having air conditioning on off grid solar. Solar panels are cheap enough and air conditioners are efficient enough to make it work.
A quality ductless mini-split, like the MRCOOL unit listed above, draws a good bit of power, but not an insurmountable amount.
When properly installed alongside adequate insulation it’s entirely possible to keep your off-grid home cold and comfortable all year round.50


